
If you have two separate phone lines, utilizing dual SIM on your iPhone is going to be a game-changer for you. I’ve always used two lines: a personal line and a line for work, so I was beyond excited when Apple announced it would be supporting Dual SIM a few years ago. In this article, we’ll discuss how Dual SIM works and how you can use it with your iPhone.
How Dual SIM Works and Why It’s Great
Dual SIM means that you can have two separate phone lines coming to the same phone. Basically, you can make and receive calls and texts from two different phone numbers on a single iPhone. This is a huge time saver and a huge space saver for people that want or have two lines. Instead of carrying two separate phones everywhere, you can get your calls and texts from both lines to the same device. The separate lines don’t even need to be from the same carrier. You could choose to have a line from Verizon and a line from AT&T or any other carrier if you’d like. Another aspect of Dual SIM is that you can have two separate data plans with two separate phone lines as well. If you’re someone who uses a lot of data, having a second data plan can be a great benefit for you as well. All of the big carriers support Dual SIM for iPhones now, so you can most likely use whatever carrier or carriers you’re already with to set up your Dual SIM.
eSIM’s
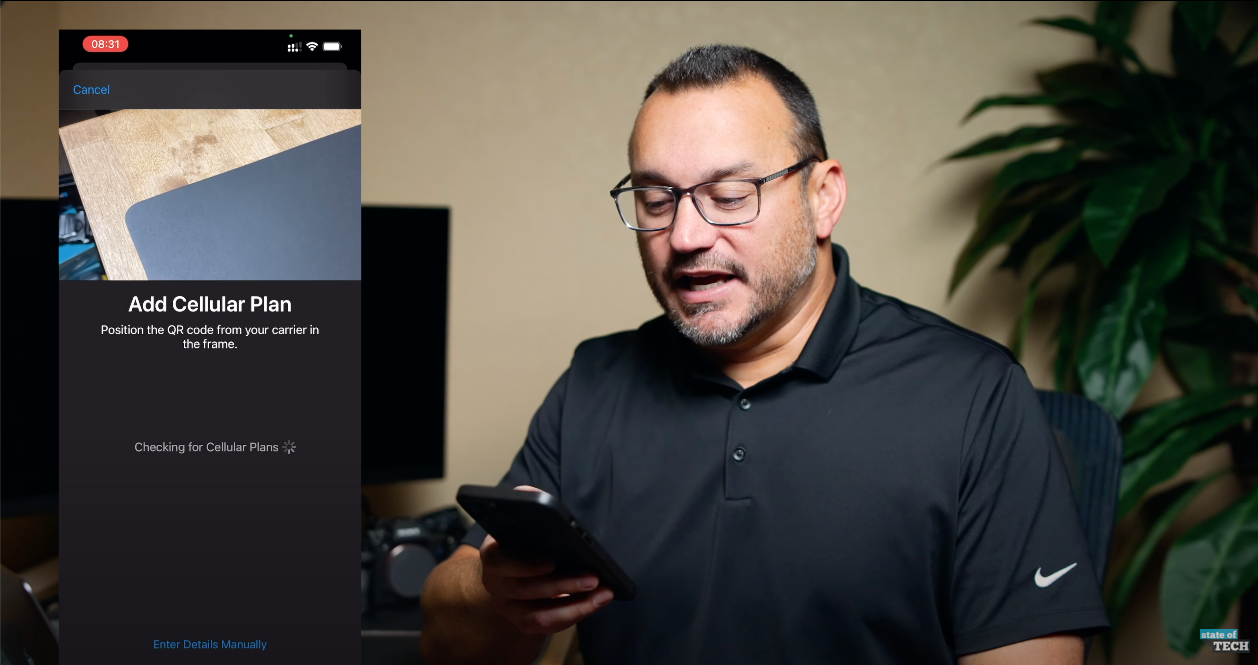
Now, the iPhone only has one slot for a SIM card. You’re probably wondering how you can use Dual SIM with only one slot. The secret is to use something called an eSIM. An eSIM is a digital format for a SIM card. This means that your second SIM will be digital instead of the standard physical card. To get an eSIM, all you have to do is contact the carrier you’d like to use and request an eSim. They will typically give you a business card-sized piece of paper with a QR code on it. Once you scan that QR, your new line will be activated digitally on your iPhone. Unfortunately, this process isn’t always as simple as it should be. I often end up needing to go in to a physical store to get support for the eSIM. While this can be frustrating, having an active eSIM as a Dual SIM on your iPhone is totally worth it.
Using Multiple Carriers
I personally use Verizon for one line and Google Fi. The main reason I use separate carriers is that I only choose to have a data plan with one of them. Since I have unlimited data on that plan, I don’t really want to spend extra money to have a data plan for the other line as well. Using Google Fi allows me to pay for a phone line without having to pay extra every month for data. Google Fi only charges you for the data you use. Because I never use data on that line, I don’t have to pay any for the data.
Dual SIM Settings
Now let’s dive in and look at some settings so you can see what this will look like on your phone. If you open your settings and open the cellular tab, you’ll see that I have two plans listed. One is listed as my primary and the other as my business.
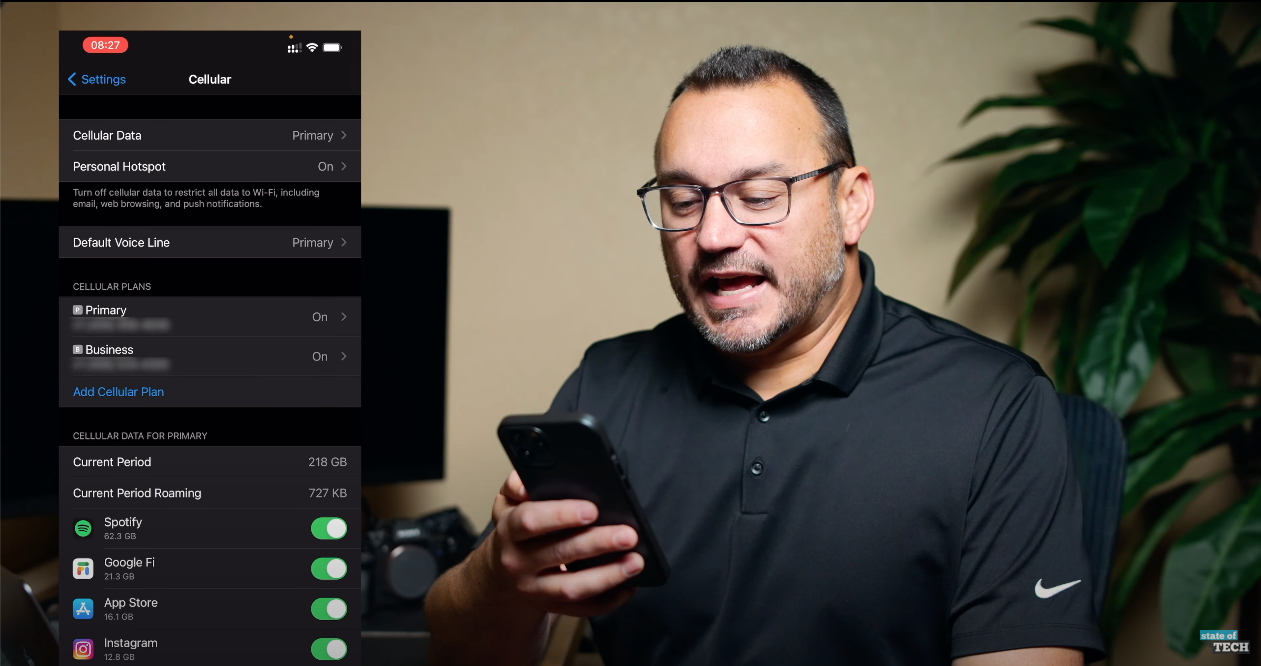
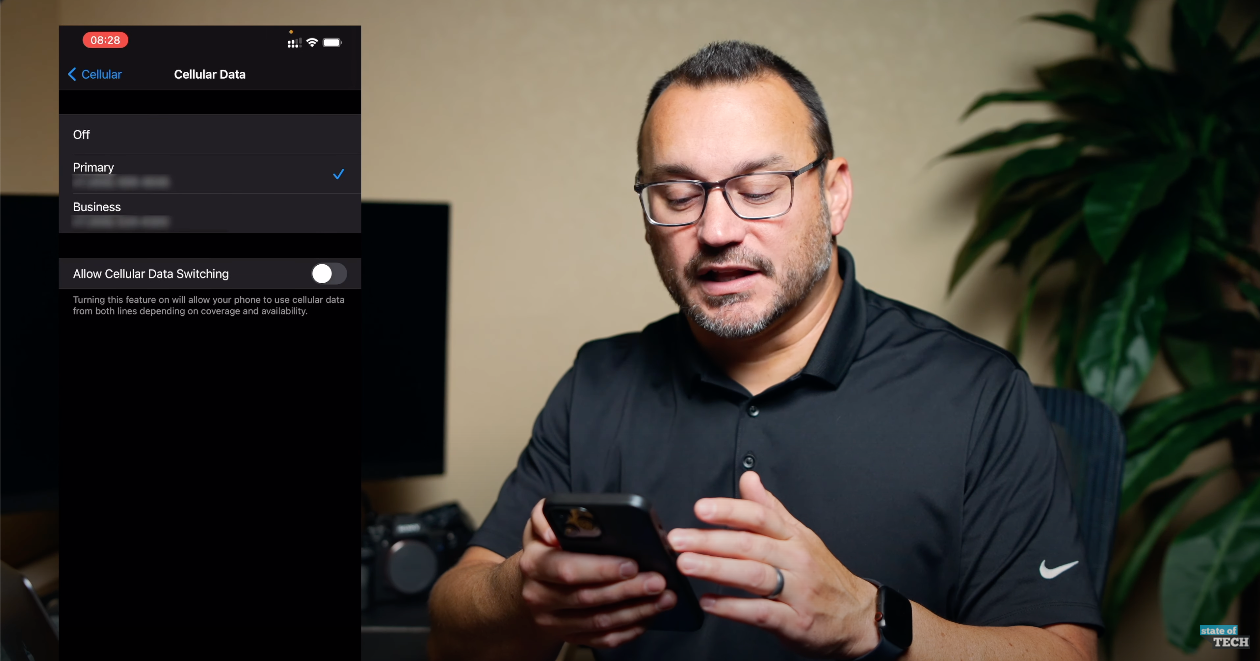
At the top of this page you’ll see that I have my cellular data set to primary. This means that when I use data it’ll be used from my primary cellular plan. I can open this and change it to my other plan if I’d like, but my primary plan is the line that I pay for data, so I leave this set to primary. I can also allow for cellular data switching which means that my phone will automatically switch from one line to the other depending on which line’s coverage and availability is stronger where you’re currently located.
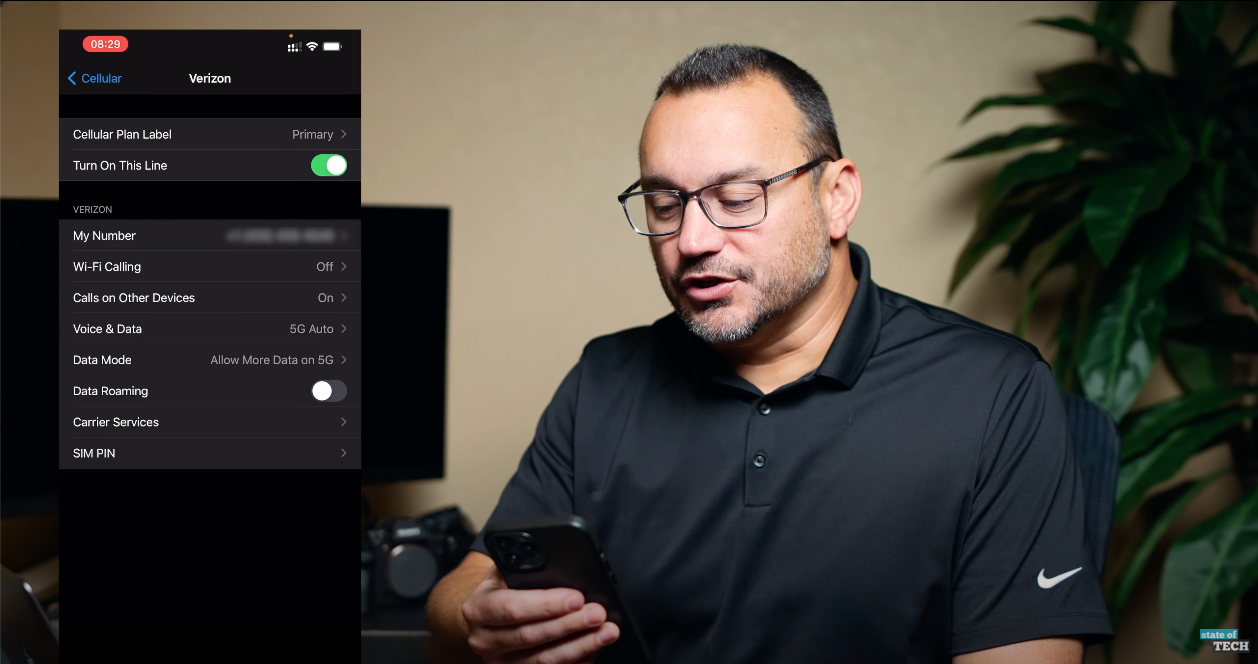
You can also set which voice line will be your default. Essentially, what this mean is that when you go to the phone app, your iPhone will automatically default to one line unless you purposefully changes. If you tap on one of your plans, you can also change the label, turn the line on and off, and change a variety of other settings as well.
The cellular settings tab is also where you’d go to add a new line. Once you tap the “Add Cellular Plan” button, it’ll take you to your camera where you can scan the QR code for the eSIM.
How to Use Dual SIM On an iPhone
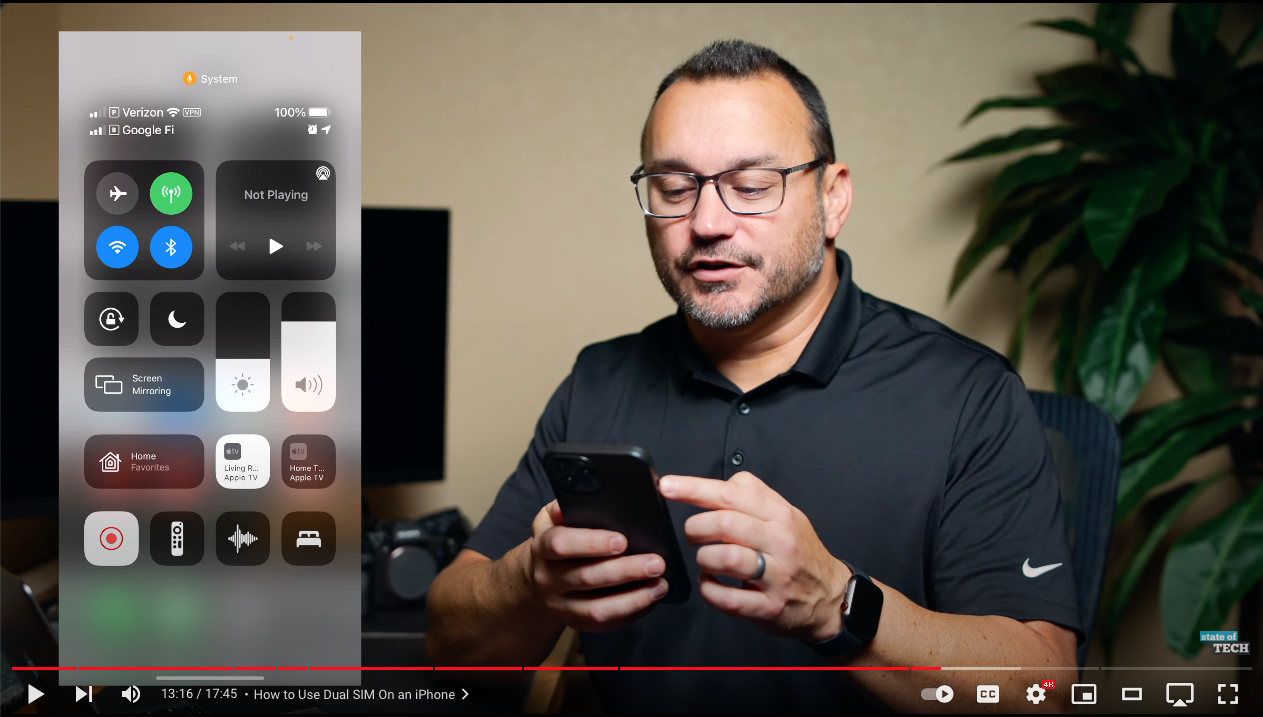
Now let’s take a look at some specifics of actually using Dual SIM on your iPhone. Once you have both of your lines set up, you can see that you’ll have two separate bars that show the connection strength of each of your lines.
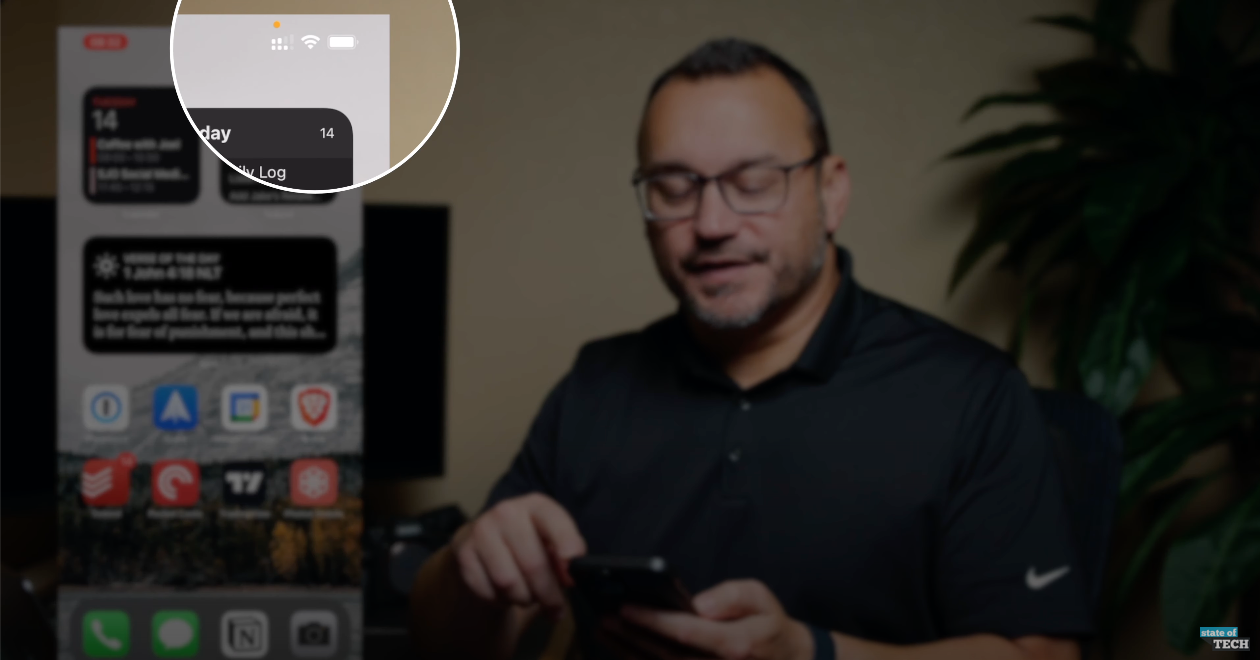
Similarly, if you swipe down, you’ll be able to see both lines listed and the strengths of each.
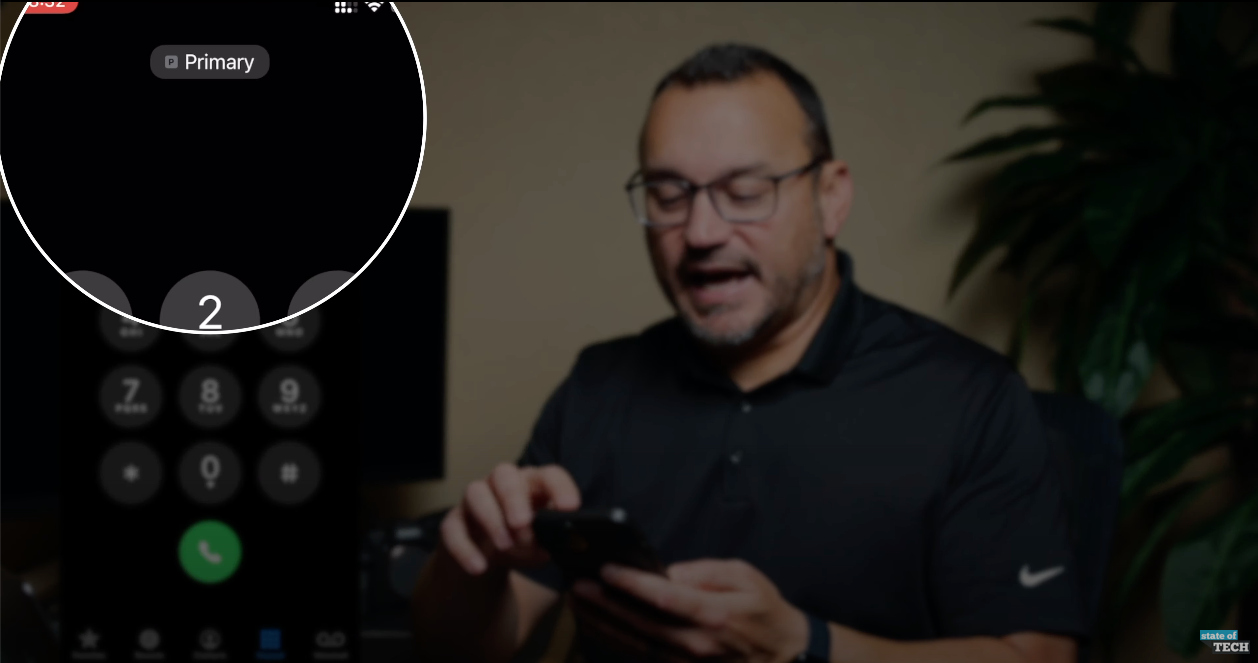
When you open your phone app to make a call, you’ll see that you’ve got a button at the top that allows you to choose which line to make the call from. This is a great feature that saves a lot of time. Just open your phone to make a call and select the line you’d like to call from.
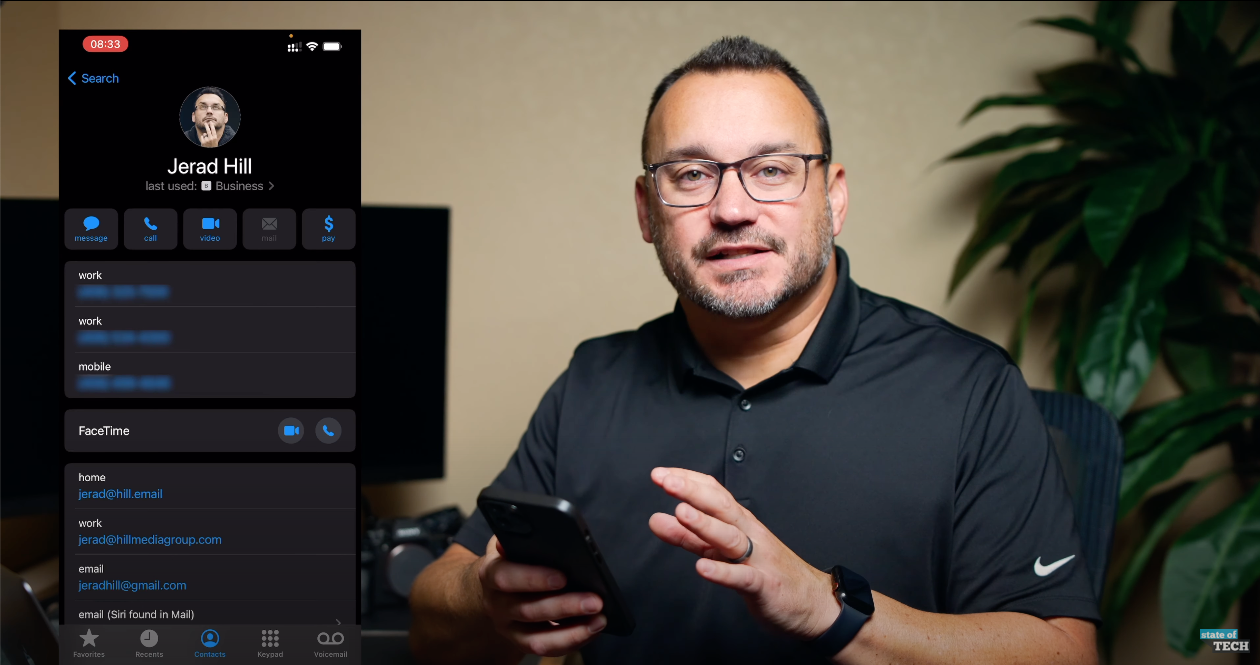
When you receive a call, you’ll also be shown which line the call is coming in for. Another cool feature of Dual SIM is that in the contacts page for a contact your iPhone will list which line was last used to contact this person.
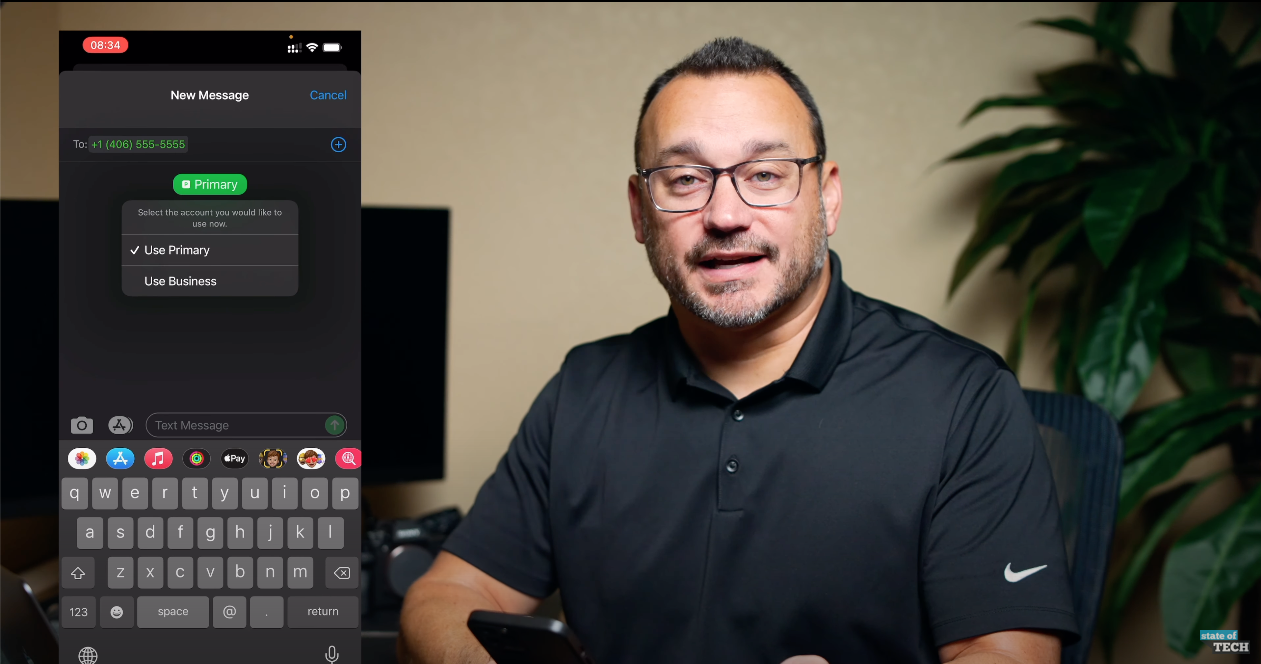
Your phone will also give you the option to choose which line to text from as well, similar to the call app.
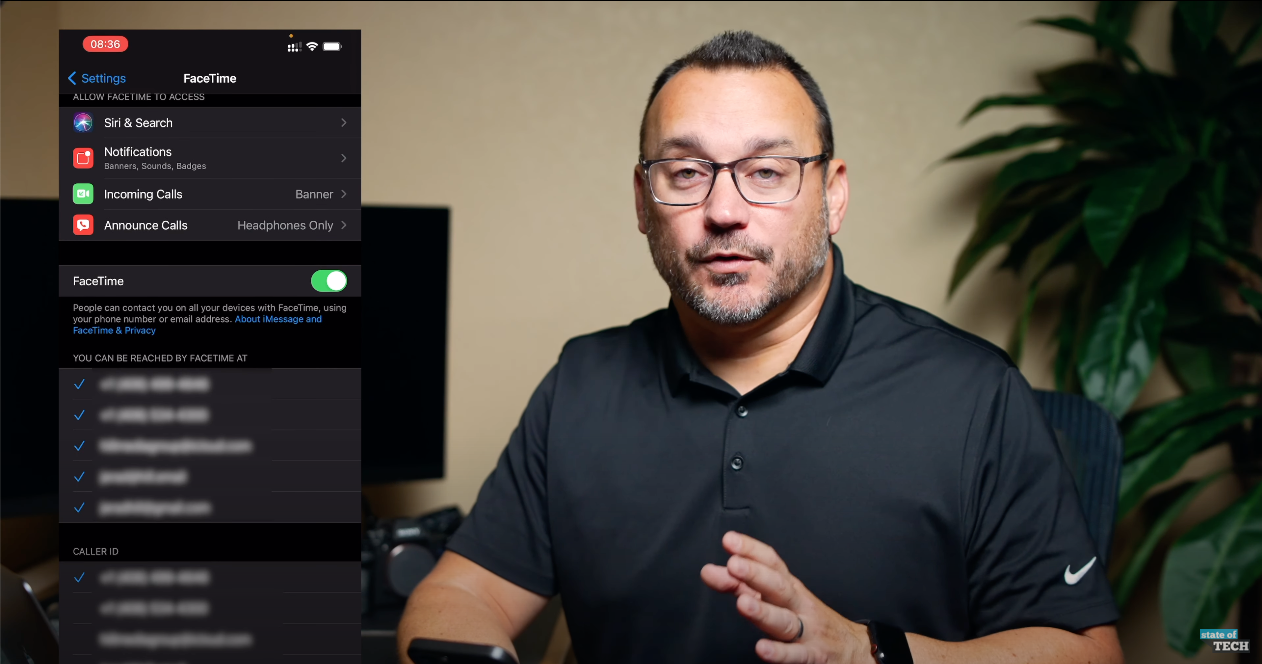
In order to iMessage and FaceTime from both lines, you’ll need to go into the iMessage settings page and the FaceTime settings page and enable those features for both lines. By default, those things may or may not enable, so you’ll likely need to enable those features manually.
Final Thoughts
Overall, Dual SIM is a fantastic feature on the iPhone. It saves you the pain of having to carry two phones around, it makes both lines accessible very simply, and it works seamlessly with your iPhone’s software. If you’re interested in more iPhone related content, check out these videos on the State of Tech YouTube channel:
